latest News

Happy Xero-ween!
Halloween is a favorite day here at the Xero Shoes office. Lena Phoenix -- Xero Shoes co-founder, CFO, and G.L.O.W. (Gorgeous Lady of Wrestling!) Halloween? Or just another typical Thursday at the Xero Shoes office? But, then again, we also dress up for "Onesie Wednesday" and "Non-casual Friday" (which is more open-ended than Formal Friday). Of course, some people go above and beyond and dress AS XERO SHOES! Whether you trick-or-treated or just gave out candy, if you did it Xero Shoes, we want to see your pics and how you Live Life Feet First!

A Rubber Band is the Secret to Better Running?
Could a new form of foot binding be the secret to better running?I don't mean wrapping up your feet in the infamous style of ancient China, but something developed by some mechanical engineers at the University of California, Santa Barbara.In short, they attached some rubber tubing between runners shoes and found that they ran more efficiently.Every stride, you slow your body down and speed it back up again," losing energy that could otherwise be conserved or put into running faster, said Elliot Hawkes, who was a postdoctoral fellow at Stanford when the research was conducted. "90 percent of the energy you put into running is wasted, in a sense.The solution to this, according to the researchers?Tie the legs together with a rubber band. Adding that band between a runner's legs could help slow both legs when they are far apart, then give them a little kick as they came back together--saving energy at both ends.While they didn't publish images of runners who weren't using the rubber tubing, here's what they showed for runners who used what they call an "exotendon":What was the effect?An improvement in VO2 Max (what many people think of as running efficiency) by an average of 6.4%Sounds amazing right?But before you go out and buy an exotendon, let's take a look at what's REALLY going on here.Can you see what the rubber band does?Start by looking at the middle image in the top row, above.You can see that the runner is about to land on their heel, with the foot relatively far in front of their body. This is a typical "overstriding and heel strike" pattern.When you run like this, every time your foot hits the ground that far in front of you, you're basically putting on the brakes. And when you land on your heel like that, research shows that you're sending force into your joints rather than using your muscles, ligaments and tendons naturally -- as built-in springs and shock absorbers.Now look at the far right image in the top row.The runners foot doesn't actually land as far in front, or as much on the heel, as it would if it weren't being pulled back by the rubber band.You can see in the bottom row that the runners form has changed and isn't overstriding as much, and is landing in a more mid-foot pattern.Hopefully, I just saved you some money or time. No need to buy or build your own exotendon.What the exotendon is doing is giving the runner a cue to run in the way that most people do when they get out of padded, elevated-heel, motion-controlled shoes!Want the same effect?Simply take the time to adapt to "natural running," by landing with your foot closer to your center of gravity instead of far out in front of you, and land, ideally, on your forefoot (no need to STAY on your forefoot only, let your foot do what's natural and use the springs built into it... your heel can drop to the ground if it feels right to do so).BTW, while many barefoot runners say that either a midfoot or forefoot landing is what you want to do, research from Harvard's Irene Davis shows that impact forces are lower with a forefoot landing than a midfoot one. So if you're a mid-footer now, you may want to experiment with "moving up" to the forefoot.Another thing that the rubber band did for runners: their cadence went up. That is, the number of times their feet hit the ground in a minute increased (without running faster). Obviously, you can do that on your own, too.The researchers say that the exotendon only works when running on flat surfaces. Needless to say, you can use natural movement anywhere, any time, under all conditions.To be fair, I'm actually NOT badmouthing the exotendon. In fact, it could be a great training aid to help people feel what a better movement pattern is like and make the switch.But it's important to know what's really going on, what the real purpose of the device is. That could actually make it MORE effective, and wean you from it more quickly.Frankly, I'm in favor of whatever it takes to help you Live Life Feet First.Keep this one last thing in mind though -- if you thought you go weird looks when you tried running barefoot, or even in Xero Shoes, just wait until you hear the comments when you strap a rubber band to your feet and hit the roads!The content of this post does not constitute and is not intended to be a substitute for professional medical advice, diagnosis or treatment. Always seek the advice of a physician or other qualified health provider with any questions or concerns you may have about your health or a medical condition.
Hiking on a 49% Grade: Koko Head Crater Trail
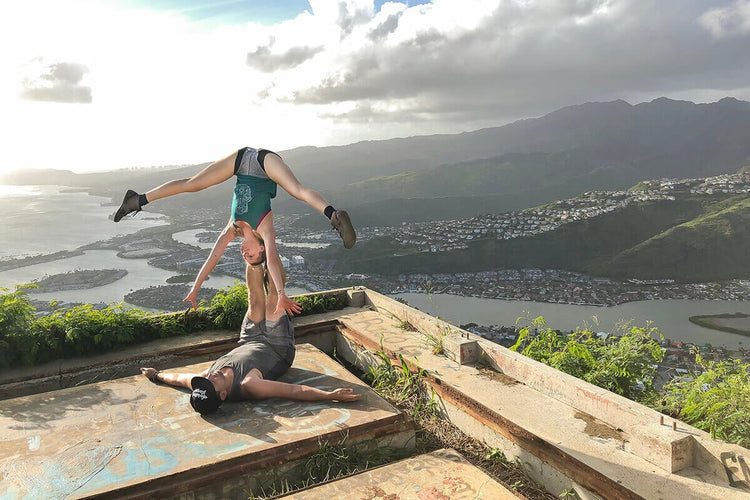
If you’re ever on the Hawaiian island of Oahu, take time away from the beach to hike Oahu’s many trails. Each are beautifully unique, providing you access into the mountains or a path to breathtaking views. One of the most unique hikes you’ll ever experience is the Koko Head Crater Trail. Created by the military during World War II, this trail is a perfectly-straight line up the face of an ancient volcanic crater. The higher you go, the steeper the trail becomes. The trail is actually a former tram railway, where you’ll step on 1,050 railroad ties. Due to the extreme slope, each railroad tie is essentially a stair, providing a relatively safe, but exhausting climb to the summit. As the slope increases, each stair is substantially higher than a normal, seven-inch stair that you’re used to. Plan on 12-18” of gain with each step as you approach the top. Our Strava recorded a 49% grade for the entire top section of the rail trail. Forty-nine percent. You’ll definitely want to feel each railroad tie, safely below your foot, before you transfer your weight and step up. We loved the stability and light-weight simplicity of our DayLite Hikers, protecting our feet from the scorching-hot surface of the old railroad ties, while providing the flexibility needed for our feet to feel their way to the top of the climb. The ankle support and protection of the DayLite Hiker was also a huge advantage, as we asked our legs to do things they normally don’t do. There is one short section where the railroad ties are elevated. Don’t look down as you cross 50’ above the ground, stepping from one railroad tie to the next! This section of the trail is one of the flatter parts, and it will be over before you know it.Facing south with some head-tall vegetation, the trail is very exposed. We recommend an early-morning start to beat the heat and beat the crowds. Take more water along than you’d normally hike with. We’d definitely recommend a pack-mounted hydration system, since you’ll almost-certainly be scrambling on all fours on certain parts of your trek. Take several breaks going up—especially as you near the top. It may take you 20-45 minutes but it’s worth every step. Once you arrive at the top of the trail, explore the concrete remains of the World War II mountain-top military installation. You won’t be at the summit, but you can easily get there by climbing another 50-75 feet of elevation as you walk along the concrete structures and the connecting dirt paths. Known as a pillbox, these WWII-era, concrete structures are located on strategic viewpoints throughout the island, and are the destination for several dozen trails.The view at the top is spectacular, with 360-degree views of the surrounding area. Most impressive is the view of the trail itself, as you see a straight line descending below your feet back to the parking lot. In 0.7 miles of climbing, you will gain nearly 1,100 feet of elevation, and the return walk is as simple as putting one foot in front of the other.The Koko Head Crater Trail is easy to access, located near Hanauma Bay and the city of Hawaii Kai. Parking and the trail are free, but are quickly growing in popularity. Get an early start, stay hydrated, and be prepared for a unique experience that your legs will never forget.@WildAcroDuo Chris & RoxyThe content of this post does not constitute and is not intended to be a substitute for professional medical advice, diagnosis or treatment. Always seek the advice of a physician or other qualified health provider with any questions or concerns you may have about your health or a medical condition.

Dave Cavanagh + Xero Shoes Prio = American Ninja Warrior!
BIG CONGRATS to Dave CavanaghDave is a multiple-time "walk on" to American Ninja Warrior. He was, finally, invited to compete in the recent try-outs in Baltimore and... well... check out how he did.And check out the shoes he's wearing!Yup, those are our best-selling running/fitness shoe, the Prio. Dave is heading to Las Vegas for the finals and we're all rooting for him!

The Hidden Hamstring: Release Low Back Pain - Xero Shoes
By Matt Giordano, @theyogimatt Updated 7/26/22 The Lower Back Do you suffer from tight hamstrings?Many runners, active adventurists, and even those who sit at a desk all day experience tremendous hamstring tightness. (“Hamstring” is the term usually used for the muscle group that runs along the back of your thighs.) As a result, the pelvis might get pulled downward in a tucked (posterior tilt) position causing the low back to be chronically rounded (flexed).For most people, constantly tight hamstring muscles will result in lower back tension, discomfort or issues with your intervertebral discs – which exist between each of your vertebrae in your spine, providing cushioning for shock absorption. Preserving the natural curvature of the lower back and avoiding back pain (or nerve pain) can prove to be challenging if the hamstrings hold tension from overuse or underuse.What most people don’t understand about the body is that it is constantly trying to correct itself. When the hamstring muscles are tight and pulling the pelvis into a posterior tilt, the lower back will hold tension because those muscles, in turn, are trying to pull the pelvis back toward neutral in order to bring the proper curvature back in the lumbar spine.So most people feel the tension in the lower back and start stretching those muscles. Unfortunately, this perpetuates the issue and can even exacerbate pain. What might be the better solution is to strengthen those muscles and stretch the muscles that are the root of the tension – the hamstrings.The challenge is finding the right hamstring stretch to properly loosen the hamstrings. So what is the best approach to hamstring stretching?The “Hidden Hamstring”Something I have noticed in most athletes is that when they stretch the hamstring muscles they do all the right stretches – like a standing hamstring stretch where they bend forward over one leg, or a chair hamstring stretch where they bring their leg up on a bench, etc.However, it is rare that I would see them stretching the inner thighs as well. As a result, they are missing what is often referred to as the fourth hamstring or what I call the Hidden Hamstring: The adductor magnus.The adductor magnus squeezes the legs toward each other like the other adductors, but uniquely it also extends the thigh back behind the hip (the back leg when running or walking).Now often when we do a hamstring stretch the hamstring muscle can be tight enough that it doesn’t allow us to get into the stretch of the adductor magnus. In other words, hamstring muscle tightness holds us back from getting to the necessary depth.Rather than straining and overstretching the hamstrings to target the adductor magnus we can simply add a slightly different stretch, one that also targets the adductors (inner thighs).Let me explain how it’s done.Best Hamstring Stretches: The Magic Pose There are a couple of amazing postures in yoga that stretch the adductors and the hamstrings at the same time. One of the best ones for hamstring stretches is the “Triangle Pose.”This pose is one of the most iconic yoga postures and there’s a great reason why! It not only stretches the hamstrings, but also the inner thighs and sides of the torso. With slight variations of the shape, you can change the intensity of stretch in each area and target your tight areas, and back off your flexible ones.If you are new to the Triangle Pose or generally have tighter hamstrings and adductors I highly recommend having a yoga block, books, or a chair to put your bottom hand on so that you don’t risk straining any of the muscle groups in this posture. A slight stretch is all you need.A very similar pose is called Side Angle, and this is triangle pose but with one knee bent. With the knee bent you will reduce tension in the hamstrings and actually be able to stretch the adductor magnus a bit more easily, so I recommend starting here and then moving to Triangle Pose. If your hamstring stretches are too aggressive you risk injuring your muscles.Now for the practical part. How do you actually get into Triangle Pose and begin to loosen your tight hamstrings?How to get into Triangle Pose Start by placing your feet wide apart from each other. Turn your right foot and thigh outward until it is perpendicular to the left foot. Bend your right knee. Place your right hand on a block, book, or chair on the outside of your right thigh. (You can also place your hand and prop on the inside as well, which will change the stretch and potentially offer a more accessible experience for those with less hamstring flexibility.) You should feel a slight pulling sensation. Stay in this posture – Side Angle Pose -to target the adductor magnus for 5-8 breaths.Pro Tip: Pull your two feet toward each other to warm up the inner thighs and hamstrings. After your 5-8 breaths, your body will likely desire to straighten the front leg. If so, proceed to Triangle Pose by straightening the front leg slowly, and stopping when the stretching sensation in your hamstring is a 7 out of 10. Stay in Triangle Pose for 5-8 breaths. To come out of Triangle, re-bend the front knee, press down into your feet and rise up. Repeat this same procedure for the left side. The ResultsThe result may or may not be immediate back pain relief. Remember, hamstring tightness is only one part of the problem. (And, besides, it will take time for your tight hamstrings to improve as you add hamstring stretching to your daily routine.) You will also need to work on strengthening the muscles that extend your lumbar spine to help bring your back into its natural curve and out of the rounding position.Be sure that if you are doing “core” workouts your core routine includes just as many lower back strengtheners as front abdominal strengtheners. Your core isn’t just the front of your belly.Triangle Pose and Side Angle Pose will help you to stretch the muscles that might be tugging your tail bone down and flattening your lower back. As a result, your lower back has a chance to come back to a place of better shock absorption and away from the stacked compressive position that is so prominent in many long-distance runners.If you are used to other kinds of stretches for your tight hamstrings, like a wall hamstring stretch, try adding Side Angle and Triangle Pose hamstring stretching into your post-run/hike/climb routine while you are warm and observe the results!Until next time,Matt GiordanoMatt Giordano is an international Yoga instructor and founder of Chromatic Yoga.The content of this post does not constitute and is not intended to be a substitute for professional medical advice, diagnosis or treatment. Always seek the advice of a physician or other qualified health provider with any questions or concerns you may have about your health or a medical condition.A note from Xero ShoesI hope you enjoyed this helpful post from Matt. Correct stretching is an important part not just of avoiding hamstring tightness and finding back pain relief, but of avoiding injuries in general.I just wanted to add a note about something else that’s super important that people often overlook: form. What I mean is the way we run or even walk.Why does this matter? The way we move affects the kinds of stresses we put on our muscles, bones, ligaments, and tendons (just like how our posture can contribute to low back pain). This is true of our hamstrings along with the other muscles of our legs and feet.I mention this because people sometimes ask me, “What are the best running shoes for hamstring injury prevention or for getting over a hamstring injury?” I’m not a doctor or physical therapist, and can’t give medical advice. I can say, though, that most “typical” footwear interferes with what your body is built to do. For example, elevated heels impact posture, stiff soles and excessive support reduce foot strength, pointed toe boxes restrict natural movement, and cushioning eliminates your foot’s ability to feel the ground.If you can see that it’s probably a good thing to let your body move the way it’s made to, then you’ll want to consider a “barefoot” shoe.Our barefoot shoes are designed to do just that: allow your feet to move as they should and give your body the feedback it needs to adopt a better form. Find your pair of Xero Shoes here.You can read more about form, why it matters, and even how it relates to lower back pain here.I always want to make sure I’m clear about this: if you have a running injury, talk to a medical professional. They may recommend physical therapy or other kinds of treatment. I’m not a doctor and nothing I am saying here is intended to be medical advice or to take the place of professional guidance.

Usain Bolt beaten by 56 year old Xero Shoes CEO?!
We've seen Steven run from bears, lions, racecars, and more...but Usain Bolt?We've put this pic on Facebook, Instagram, Twitter and here, on the blog, where you can comment below. Head to one (or all) of those places and give us your best caption about Steven and the greatest sprinter of all time.One winner will be selected to receive a FREE pair of Xero Shoes of their choice. Winner will be selected April 25, 2019.

Get Xero Shoes Z-Trail at REI and get a $10 thexeroshoessale.com Gift Certificate
We are THRILLED to announce that you can now buy our best-selling Z-Trail sandal at REI stores across the country and at REI.com!Plus, we have a special offer for you:Buy a pair of Z-Trail at an REI store or REI.com and you can get a $10 thexeroshoessale.com gift certificate!Get all the details about which stores have the Z-Trail sport sandal and how you can get your bonus -- CLICK HEREWatch Lena and Steven discover the Z-Trail at the Boulder REI
Jumping Rope for Cardio
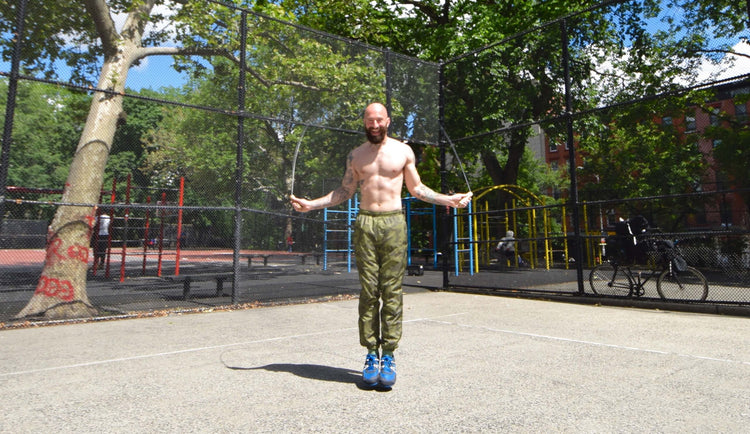
It might be a lot of fun, but jumping rope is not just for kids. The jump rope is a fantastic device for building stamina and athleticism, plus it’s also a great method for burning fat.In fact, a jump rope is one of the best cardiovascular conditioning tools out there–way better than a treadmill or elliptical trainer. Plus you can take it with you anywhere!Jumping rope can also have a huge impact on improving your coordination and agility. You can probably expect to get winded and feel uncoordinated the first time you try jumping rope for cardio, but after a few sessions you will start to get the hang of it.Basic Jump Rope TechniquesThe first thing to learn is the standard two-foot jump. Start with the rope behind your heels, then whip in over your head and jump over it with both feet at the same time. If you are brand new to this, it might be best to just practice single jumps, resetting your rope after each rep. Eventually the aim is to transition from jump to jump as smoothly as possible.Once you get that move down, you can try alternating feet like you are jogging in place while the rope passes beneath you on each step.Crossovers and Double UndersAfter you’re comfortable with the basics, you can start to play around with crossover jumps. This entails switching the position of your hands in mid air, so your left hand winds up outside your right hip and your right hand is outside your left hip. On the next jump, you’ll then switch them back. It takes focus and coordination to get the timing right for this one, so be prepared to put in some practice before you will be able to perform them consistently. Also be prepared that you may need to jump a bit higher in order to stay in the air long enough to cross your hands back and forth between jumps.A double under refers to a jump in which the rope goes underneath the feet of the jumper twice during a single leap. In order to perform a successful double under, you’ll need to whip the rope extremely quickly and jump higher than normal to make room for the rope to pass beneath you twice before you land.Programming Your Jump Rope WorkoutIn the beginning, I suggest simply practicing the basic techniques before you worry about any specific programming. You can practice for a few minutes at the start of your workout as a warm-up, or do it at the end. You can also do it on a separate day entirely. As long as you get it in, when you do it is up to you.Once can comfortably jump continuously for at least 60 seconds, you can try doing intervals where you alternate between one minute of jumping and one minute or rest. Keeping that pace up for 20 minutes can be surprisingly tough at first! As your technique and conditioning improve, you can aim to make your jumping intervals longer and your breaks shorter. You can also increase the length of your sessions.For variety’s sake, I recommend practicing some crossovers and double unders, particularly during longer sessions. Be aware that these moves will be more tiring, however, so you may need to adjust your work-to-rest ratio to account for this. One of my favorite ways to practice crossovers and double unders is simply to pick a total number to aim for in a single session, then hit that target in as many sets as it takes, with as many breaks as needed. At first, you might aim to perform just 10 of each in a given session, as you will miss many of your early attempts and expend a lot of energy doing so. As you get more proficient, you can increase that number to 100 or more.So what are you waiting for? Grab your Xero Shoes and let’s jump around! -Al Kavaldo http://www.AlKavaldo.comThe content of this post does not constitute and is not intended to be a substitute for professional medical advice, diagnosis or treatment. Always seek the advice of a physician or other qualified health provider with any questions or concerns you may have about your health or a medical condition.
More Buzz about Vibrating (and Parkinsons)
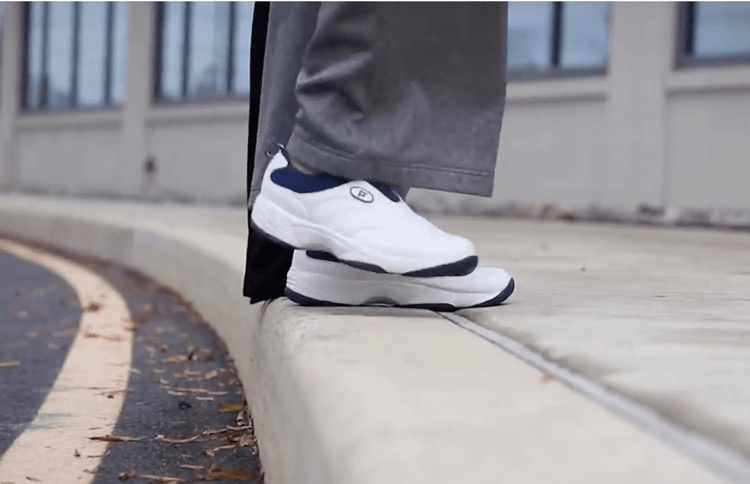
It's happening again, I think.In the Thomas Industry, David Mantey reports on a new device designed to help Parkinson's patients "walk with greater ease."What does it do?It applies vibration your feet.A few years ago, I reported on a similar device.So...Q: What is vibration doing?A: Stimulating your nervous system, feet first.Q: Why might you need extra stimulation?A: Because you aren't letting your feet do one their primary jobs: FEELING (there's a reason you have so many nerve endings in the soles of your feet) Take a look at this screen grab from the video about the "VibeForward" device:That's over an inch of padding between you and the ground. And a sole that's stiff enough to prevent your foot from moving naturally.This is like putting your foot in a cast.Now here's the fun question:Q: What else could stimulate the nerves in your feet?A: USING THEM.Taking off your shoes so you don't have an an inch of padding between you and the ground. And then, for extra credit, walk on surfaces that, well, stimulate your feet -- grass, sidewalks, trails, gravel, river rocks... you get the idea.At the very least, put LESS between you and the ground (that's how we design Xero Shoes -- to give you feedback and ground-feel, but still have some protection).Is this exactly the same as the VibeForward? No, walking barefoot doesn't require batteries, or an app, or use "artificial intelligence."Q: Will kicking off your kicks and using your feet naturally have the same effect for Parkinson's patients who suffer from freezing gait?I don't know. But, then again, the data isn't in about the VibeForward yet either.The Michael J. Fox Foundation gave the University of Delaware $440,000 to study the VibeForward.Here's my big question:Q: How can we get the Michael J. Fox Foundation to fund a study on natural movement -- something that's available to everyone NOW?Got an answer?The content of this post does not constitute and is not intended to be a substitute for professional medical advice, diagnosis or treatment. Always seek the advice of a physician or other qualified health provider with any questions or concerns you may have about your health or a medical condition.
Hiking for Health
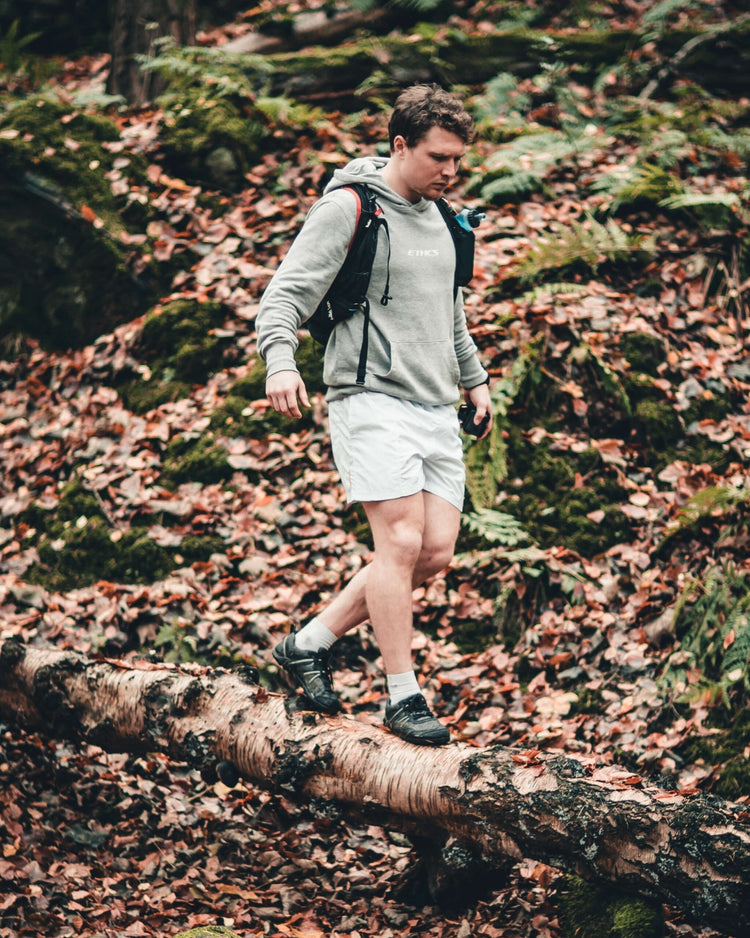
Want to improve your health AND have fun? Take a hike! Hiking has significant health benefits. Here are just 5: Hiking on rugged trail surfaces is a natural way to engage your core muscles, Burn calories -- Hiking on uneven terrain increases the amount of energy used by your body by 28 percent compared to walking on flat ground, Get strong -- Hiking helps to strengthen often neglected muscles in your hips, knees, ankles, and feet to improve balance and stability, Hiking is good for your brain: research shows that time spent in natural environments engages all five senses and calms brain activity, Instant meditation -- just being out in mother nature reduces your mind’s tendency to get stuck on negative, self-focused thought patterns – resulting in a happier, healthier you! So, go on a hike! Your body and mind will thank you.Your new favorite shoes for hiking and trail running:The content of this post does not constitute and is not intended to be a substitute for professional medical advice, diagnosis or treatment. Always seek the advice of a physician or other qualified health provider with any questions or concerns you may have about your health or a medical condition.
Comfy, Cushioned Shoes Can CAUSE Injuries
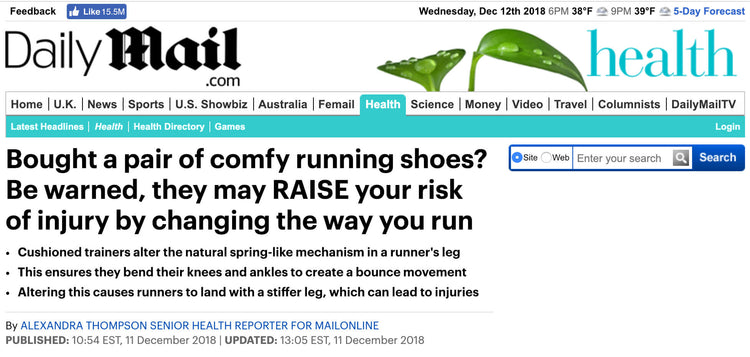
This just in from the "Tell me something I didn't know" department. ;-)The UK's Daily Mail reports, "Comfy trainers RAISE the risk of injury." You would think that a major publication telling readers why "maximalist shoes" are bad for you would make me happy, but read on and you'll see why my glee is tempered with frustration. (Click on the image, above, to see the article or find it on the Daily Mail site: https://www.dailymail.co.uk/health/article-6483593/Comfy-trainers-RAISE-risk-injury.html) In short the article comments on research from Dr. Juha-Pekka Kulmala, and says: [Between] 37 and 56 per cent of joggers experience injuries every year worldwide. These injuries are thought to largely occur due to the vertical force that is created when a runner's foot hits the ground. To reduce this, many trainer manufacturers have added cushioning to their shoes' soles, however, there is no evidence that this actually prevents injuries. ...Runners' feet hit the ground harder when they were wearing cushioned trainers. A video analysis showed the runners bent their knees and ankles less when they wore the cushioned shoes, which caused their bodies to slow down quicker and placed extra stress on their legs. Now, this shouldn't be news to people familiar with Xero Shoes, or this site, or the myriad studies done showing the problems with cushioned footwear and the benefits of truly minimalist shoes (not shoes sold with "minimalist" in the name, but without the same design principles.So, on the one hand, I'm thrilled to see the truth in print.On the other hand, this article does the same thing that others of this type have done, namely: Makes it seem like the bad control "the Brooks Ghost 6" is good for you, since it's better than the Hoka Conquest. Paints the picture that there's actually a debate, or a value for what we affectionately call "foot coffins" (any shoe that doesn't let your foot bend, flex, move, feel). In the article, Dr. Kade Paterson, a podiatrist at the University of Melbourne, says: 'As a sports podiatrist, I’ve seen patients who’ve reported improvements with maximalist running shoes and others who’ve got injured in them so there probably isn’t a one-size-fits-all approach.' Dr. Paterson added the results do not suggest runners should ditch cushioned shoes entirely and said 'like many health-related things, we should be somewhere in the middle'. The only way you can come to that conclusion is if you do something else that most articles of this type do:Don't reference the research on true minimalist footwear, like that done by Dr. Irene Davis or Sarah Ridge or Isabel Sacco and others. This research paints a compelling picture for why natural movement, well, is better than shoving your foot into something that's not foot-shaped, not flexible, has elevated heels with flared soles, and too much padding. You know, like the Brooks Ghost 6.Even more absurd is the warning given at the end of the article:Dr. Kulmala has previously warned about the trend of barefoot running, which he only recommends if you land at the front of your feet. Most people land on their heels, which creates a larger force and therefore needs more cushioning, he added.ARGH!Talk about missing the point. Or putting the cart before the horse. Or confusing cause and effect. Or some better metaphor or analogy than I can think of now.Harvard's Dr. Daniel Lieberman and others have shown that putting padding under your heel is what encourages heel striking to begin with, and that running barefoot tends to naturally shift you to a forefoot landing, which reduces those stressful forces on your bones and joints because you use your muscles, ligaments and tendons as the natural springs and shock absorbers they're meant to be.So, put it all together...Look, I'm glad that the "myth of maximalism" is being dismantled, but I hope that the "truth of natural movement" gets more attention in the process.The content of this post does not constitute and is not intended to be a substitute for professional medical advice, diagnosis or treatment. Always seek the advice of a physician or other qualified health provider with any questions or concerns you may have about your health or a medical condition.
5 Tips to Help Prevent Running Injuries
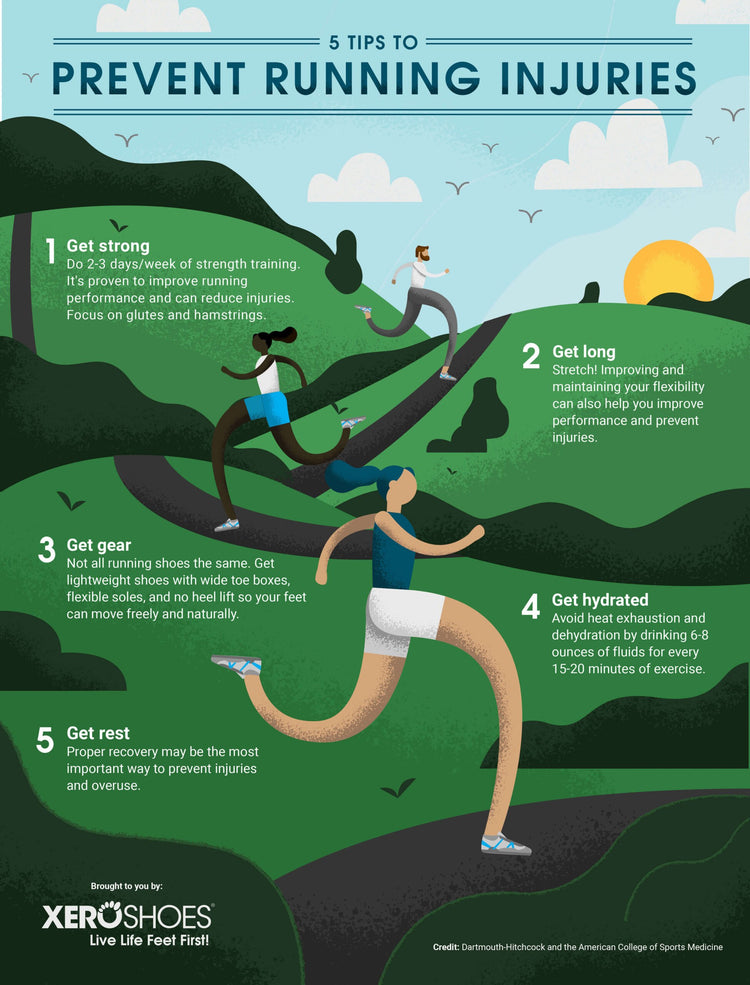
While it's not possible to never get injured when running (or living, for that matter), here are 5 tips to help keep injuries at bay. What do you think? Have any other tips? Leave them in the comments, below.Think other people could use these tips? Share this page.Want it for yourself? The content of this post does not constitute and is not intended to be a substitute for professional medical advice, diagnosis or treatment. Always seek the advice of a physician or other qualified health provider with any questions or concerns you may have about your health or a medical condition.